

Easy Solutions for Making Tough Meat More Tender
I just returned from an early season, warm weather deer hunt in the central coast area of California. It was about 100 degrees in the afternoon and, unfortunately, it took a bit longer than I would have hoped to find the animal after it was shot.
Leaving a dead or mortally wounded animal on the ground in hot weather happens, but we’d all prefer a solid kill shot with an animal that drops dead immediately. Fortunately, we found this one before it got too hot. Since this was a “TV hunt”, part of what it is that I am supposed to do is to show viewers how to cook it, or at least part of it.

And since we didn’t have the time to let it hang for a week or so before processing, I removed part of a backstrap and tossed it on the grill with some local produce. Some of the other people from our group joined us for a taste test.
“You know, I thought it would be more tender than this. The flavor is good, but it’s a little tough.”
Oh, it was tough all right. And it always will be tough when not given the proper hang time. During the first 24 hours after the kill, deer go through rigor mortis. That’s when the muscles stiffen and contract. Now, I know people who swear that it doesn’t matter if you cut your deer up before rigor mortis has done its thing and I tend to agree, especially when it’s necessary to quarter an animal before packing it out. But I’ve found that hanging antlered game for a day or two before removing that backstrap makes for a more tender hunk of meat. If you’re skeptical, try this. Right after the animal has been field-dressed and skinned, cut out a section of the backstrap. Let the rest hang for another day or two and cut out another section. Now let the animal hang for another week or so and cut out one more piece of the backstrap. You should notice a distinct difference in tenderness between the three cuts. The first cut should be noticeably tougher than the last.
I’ll address hanging and aging in more detail down the road, but it is worth keeping in mind as you get yourself ready for the upcoming season. At times, you do everything right – field dressing, aging and, of course, not overcooking the better cuts – and you still end up with a tough hunk of meat. So what’s the deal? Meat is meat, right? It’s not raised in a laboratory and various factors can affect how an animal will taste at the dinner table. Regardless of how it turned out to be so tough, all is not lost. If you’ve got the time, even the toughest deer can be tenderized.
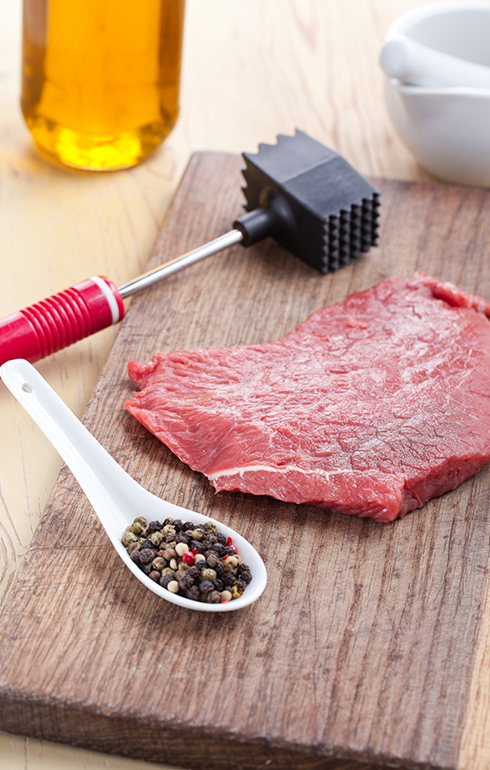
– Meat Mallet. Cut the meat into 2-inch chunks and pound it first with the tenderizer side or a meat mallet, then with the smooth side. Keep wailing on them until they are about 1/4-inch thick. Great for frying or just a quick-cook on a grill or in a hot skillet. If you don’t own a meat mallet, you should.
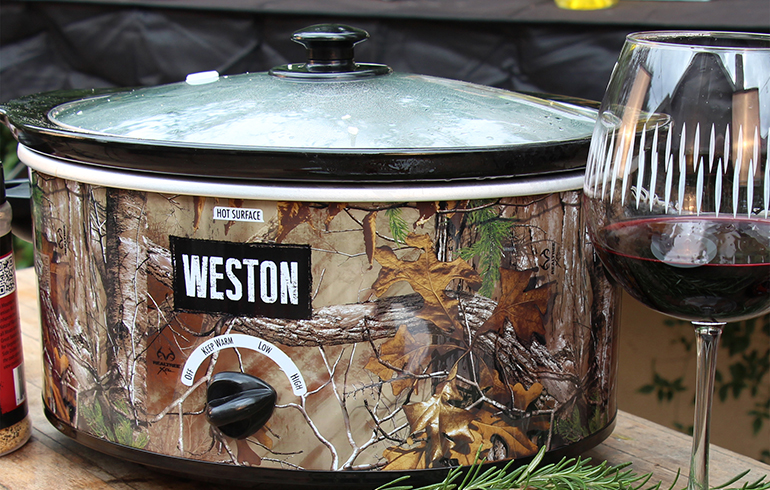
– Slow Cooker. Cube it, brown it and place into a slow cooker with some vegetables and enough broth to cover whatever’s in the pot. Let it simmer for as long as it takes to turn the meat into something that will break apart with little pressure. If it’s meat that’s cooked with slow, moist heat it will eventually be tender. Oh sure, it might take all day, but it’ll get there.
– Grinder. Although many of us grind way too much of our larger animals, it’s a great way to tenderize tough meat. Add some pork or beef fat to the grind and it will be tender and juicy when cooked.
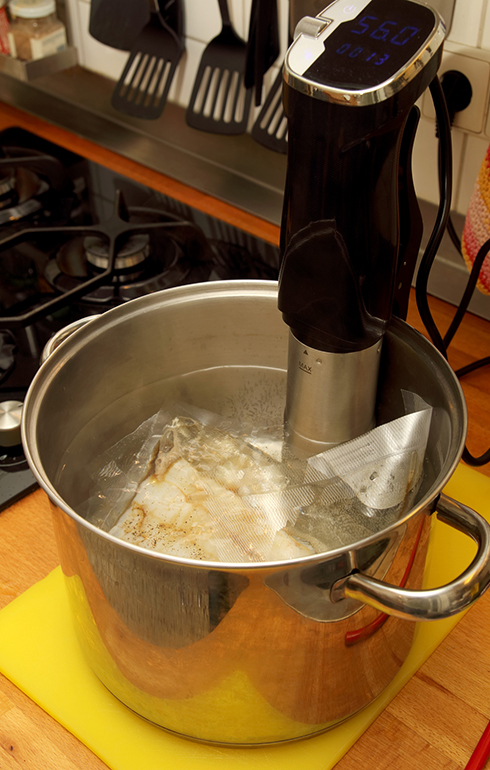
– Sous Vide. You take a seasoned piece of meat, vacuum-pack it and place it in a warm water bath. There are a number of sous vide units on the market from portable gizmos that can be placed into anything that will hold water to high-dollar permanent fixtures that my wife won’t let me keep on the kitchen counter. What a sous vide unit does is circulate water at a precise temperature. The meat is comfortably encased in a vacuum-sealed bag (or a sealed zipper lock bag) as the hot water circulates around it. You set the temperature and the water, and the meat, will never get above that temperature. You can go to work knowing that, when you get home, your formerly tough Canada goose breasts are now fork-tender. What you lose in the sous vide process is charred meat. It cooks evenly throughout so it’s best to undercook it and brown it with high heat in a skillet, over a grill or under a broiler. I have a friend who refuses to cook Canada goose breasts any other way. For those who insist on cooking whole ducks, which is usually a bad idea since the legs and thighs take so much longer to cook than the breasts, doing the sous vide thing for 12 hours or so at 128 degrees will not only produce perfect breast fillets, but the otherwise sinewy legs and thighs are tender, too.